Hosting a “Google Cloud WordPress” site is not typically the first thing that comes to mind for most website owners. However, the platform offers many advantages, including robust performance, scalability, and reliability.
The only problem is that Google doesn’t realize how complex the process has become. Part of the reason is the many features and components available with Google Cloud, but that won’t help the many who will simply turn away.
This guide aims to explain each step in detail, ensuring you can follow along easily. We also want to recommend a better option in the form of Google Cloud + Cloudways.
1. Before You Begin: The Prerequisites
Running into things as you go along can be a culture shock. Let’s take care of these items before starting with WordPress on Google Cloud. Here’s what you can prepare beforehand:
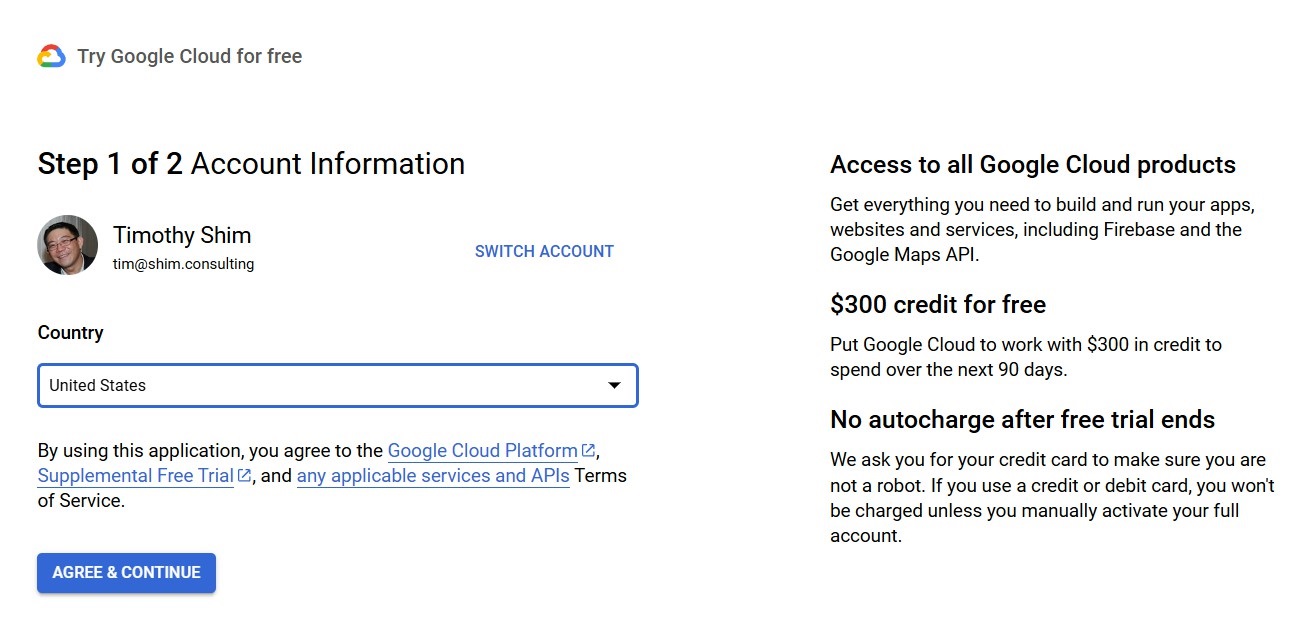
- Google Cloud Account: To get started with WordPress on Google Cloud, you’ll need a Google Cloud account. If you don’t have one, you can sign up here.
- Billing Setup: This is part of the Google Cloud account setup process. You must provide a credit card for your payment profile. However, Google provides $300 in starting credit and will only charge your card if it is manually activated later.
- Domain Name: You’ll need a domain name for your WordPress site. You can register a domain through services like Namecheap or GoDaddy.
- Technical Requirements: Basic knowledge of cloud hosting, SSH, and command-line tools is helpful but optional. This guide will provide detailed steps.
2. Setting Up a New Project

Projects in Google Cloud help you stay organized. Each project can have individual billing, permissions, and settings, making keeping your environments separate and manageable easier.
More importantly, each project contains all the necessary resources to operate.
For example, a project for a WordPress site will include a LAMP stack, which it requires to run.
Here’s what you’ll need to do:
- Login to your Google Cloud account
- Click on the project dropdown in the top menu and select “New Project.”
- Enter a name for your project and click “Create.”
3. Installing WordPress
One of the most significant assets that Google Cloud provides to users is the Marketplace. Think of this like an app store where you can find ready-to-deploy applications. It’s fast, effective, and reliable—provided you deploy certified images.
The more challenging part of this step is configuring the virtual machine you’ll need to run your WordPress website.
Search for WordPress Certified by Bitnami and Automattic

Click the “Marketplace” option on the left navigation menu and search for “WordPress certified.” This will bring up a list of certified WordPress options.
Click on “WordPress Certified by Bitnami and Automattic”.
You’ll see an overview of the selected option on the next screen. This includes the software stack that will accompany the installation. Scrolling down that page, you will also see an estimate of the VM requirements for running this WordPress instance.
Once you’ve reviewed everything, click “Get Started” and agree to the terms and conditions. If this is your first time setting up this project, you may also have to agree to install some components; you can allow Google to continue.
Configure your infrastructure on Google Cloud Platform

Next comes the detailed setup of the virtual machine on which you’ll be running WordPress.
Setup the zone for your virtual machine
Google Cloud configures this as a “bare minimum” format by default. You should mainly pay attention to the “Zone” setting. This sets the location of your virtual machine.
Note: If you’re simply testing the process, leave everything as default. However, if this is intended to be an operational website, you should provide at least 2GB of RAM.

Once you’ve adjusted the settings to your liking, click the “Deploy” button at the bottom of the page. Google Cloud will automatically set up the virtual machine and install all the necessary applications as dictated by the instance you selected earlier.
First login to your WordPress admin
When this is done, the system will send you an email (or you can wait; it takes just a few minutes). Note your username and temporary password. You can log into your WordPress admin dashboard directly by clicking the “Log into Control Panel” button.

4. Mapping a Domain Name
Now that you have WordPress up and running, it’s time to give your website a user-friendly address. Head to a domain name registrar like Namecheap and purchase a domain name. When that’s done, log in to your registrar dashboard and access the DNS settings.
Here, you must configure the A and CNAME records.
For the A record: @, Type: A, TTL: 3600, Value: 123.123.123.123.

For CNAME: www, Type: CNAME, TTL: 3600, Value: my_wordpress_site.com.
5. Setting up an SSL Certificate
With the domain name configured, you can now set up an SSL certificate for your website. This is an essential step since Google frowns on non-SSL-equipped websites. You can start with a free SSL from Let’s Encrypt.
For this, we are going to use a tool called Certbot, which will help you automate the process. If you don’t use Certbot, you must repeat the SSL process each time your certificate expires.


Once you’re at the common prompt, you must do several things in sequence to install Certbot and your SSL certificate.
- Update packages: sudo apt-get update
- Install Certbot: sudo apt-get install certbot python3-certbot-apache
- Get a new SSL certificate: sudo certbot –apache
- Verify the SSL installation: sudo certbot renew –dry-run
- Restart the Apache engine: sudo systemctl restart apache2
Once you’re done, remember to change the WordPress URL to HTTPs in your WordPress admin dashboard. Head to the dashboard, and the option is under Settings -> General. Save your changes once you’re done.
Pros and Cons of Google WordPress Hosting
As with everything else, hosting a WordPress site on Google Cloud has pros and cons. While many of these points are generic across cloud hosting providers, several notable ones regarding the Google platform exist.
Quick Overview
Pros
- Fast and stable
- Well-recognized brand name
- Highly configurable
- Massive range of server locations
- Google Cloud Marketplace is well-stocked with apps
Cons
- Expensive
- Can be challenging to configure
- Requires a fair amount of technical knowledge
- Features can be confusing at times
On the plus side, Google Cloud is a known entity trusted by many large companies worldwide. It’s fast, stable, and highly reliable, with many options you can fine-tune to almost any need.
However, some of these advantages come with strings attached.
For example, due to the breadth of features available on Google Cloud, getting what you need up and running can be confusing for non-Cloud natives. While Marketplace offers ready-to-deploy apps, these won’t help with VM configuration.
Google Cloud can also be extremely expensive. Incorrect configurations can easily waste resources (and, hence, money). For those facing this dilemma, there are better alternatives.
Plan B: Simplifying WordPress Hosting on Google Cloud with Cloudways

Many large organizations opt for Google Cloud thanks to its reliability, power, and many features. However, managing Google Cloud services can be stressful for smaller organizations, especially those with limited technical resources.
The answer to this dilemma is Cloudways, a managed Cloud service provider that vastly simplifies things. Cloudways uses VMs running on Google compute engines and other Google Cloud services.
Exclusive Deal
Use promo code ‘HOSTSCORE’ to enjoy 25% discount for 2 months on your first Cloudways hosting bill. Click here to check pricing and order with a discount.
Hosting on Google Cloud with Cloudways Brings Four Benefits…
Fully Managed Plans
Cloudways offers fully managed Google Cloud based hosting plans. These plans allow you to benefit from the power and reliability of the Cloud without worrying about technical details and complexities.
They take care of server setup, management, and operations so that you can focus on what matters: your business.
“Best service we use with probably the best customer support experience ever. They fix our website and are just so easy to work with.”
Emily Porter, Owner of Theoberports
Quick and Easy Setup
As our guide above shows, setting up WordPress to run on Google Cloud can be a complicated process. Cloudways simplifies this by automating everything so that you can get things done with a few button clicks.
Constant Monitoring
Remember that getting your Cloud up and running isn’t the end of the story. You also have to monitor server performance to ensure smooth operations. Unlike Google’s hands-off approach, Cloudways provides continuous monitoring, giving you peace of mind.
“Cloudways provides exceptional visibility into resource allocation across servers for various projects, enabling my team to optimize resource utilization and ensure seamless project execution.”
– Robbie Kohli, CEO of Deep Focus
Stress-free Pricing
The flexibility of Google Cloud hosting comes at a steep cost. Cloudways helps keep things on a more even keel by stabilizing hosting resources and offering them at more palatable prices for smaller businesses.
| Plan | Memory | CPU | Storage | Bandwidth | Prices |
|---|---|---|---|---|---|
| GCE Small | 1.75 GB | 1 Core | 20 GB | 2 GB | $37.45 |
| GCE Medium | 3.75 GB | 1 Core | 20 GB | 2 GB | $84.12 |
| GCE Large | 7.5 GB | 2 Core | 20 GB | 2 GB | $152.14 |
| GCE XL | 15 GB | 4 Core | 20 GB | 2 GB | $241.62 |
| GCE 2XL | 30 GB | 8 Core | 20 GB | 2 GB | $412.82 |
| GCE 4XL | 72 GB | 16 Core | 20 GB | 2 GB | $722.06 |
Click here to check pricing and order with a discount.
How to Start?

The process of setting up your WordPress site on Google Cloud + Cloudways is easier and faster. The steps to follow are:
- Sign up for a Cloudways account.
- Signup to Cloudways here, use promo code “HostScore” for additional discount
- Log in and click the “Launch” button to start a new server.
- Under “Select Your Application”, choose WordPress, and enter Application Name, Server Name, and Project Name.
- Choose your server
- In “Choose Your Server”, select Google Cloud Platform.
- Choose the server size and location.
- Set server resources (CPU, RAM, storage) and review the estimated cost.
- Click “Launch Now” to set up the server.
- Once ready, go to the Applications tab and click on your WordPress application.
- Note the Admin Panel URL, Username, and Password.
- Open the Admin Panel URL in your browser and log in with the provided credentials.
- Customize Your WordPress
- Set up a custom domain in the Domain Management section and point it to the Cloudways server.
- Configure SSL in the SSL Certificate section using Let’s Encrypt.
- Install themes, plugins, create content, etc
- Double-check all settings and configurations, then launch your WordPress site.
Final Thoughts
Hosting a WordPress website on Google Cloud is straightforward. This guide will allow almost anyone to do the job. However, straightforward is far from easy, and many will ultimately wonder if hosting with Google is worth the pain.
For that to be worth the extra effort, you need to be extremely partial to the Google brand. Thankfully, Cloudways brings Google infrastructure to us in a more manageable and cost-effective manner.
We’ve hosted happily with Cloudways for years and have shifted an increasing number of websites to this platform, primarily because of its simple handling and excellent performance.
Frequently Asked Questions
What is Google Cloud?
Google Cloud is the company’s cloud computing platform. It includes an incredible array of products and services that allow you to run highly customized applications. You only pay for the resources and services you choose, making it cost-effective for many larger organizations.
What is a Virtual Machine (VM)?
A VM is an emulation of a computer system. This technology allows individual computers to host multiple VMs, each encapsulating a dedicated environment with resources and virtual hardware.
What is Google Cloud Marketplace?
Google Cloud Marketplace is an online store that offers a variety of pre-configured software solutions. These help users easily and quickly deploy them on Google Cloud. They cover a broad spectrum, from web hosting to business and database applications.
Is WordPress hosting on Cloudways cheaper than Google Cloud?
When compared directly in terms of resources, Cloudways is almost always cheaper than Google Cloud for WordPress hosting. It also has the advantage of being easier to manage, especially for non-tech-savvy customers.
What is Cloudways Autonomous?
For high-traffic websites, Cloudways offers a range of Autonomous WordPress hosting plans. These automatically scale resources so your website will never fail, even during the busiest holiday season sales.